Today, I’m going to talk about how my MacbookPro (late2013), which I’ve been using for many years, is running out of 512G internal SSD, so I’m going to upgrade it to 1000G with even faster access speed. The cost will be paid off by selling the internal MacbookPro’s SSD.
What you need
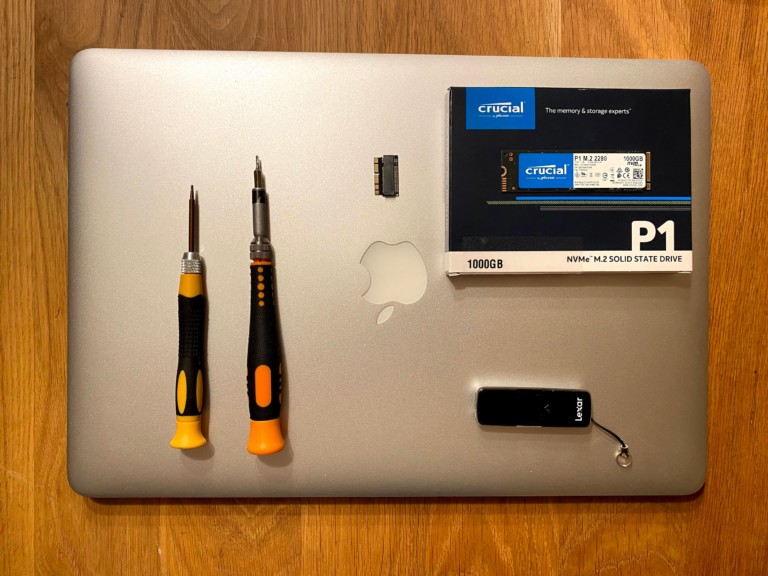
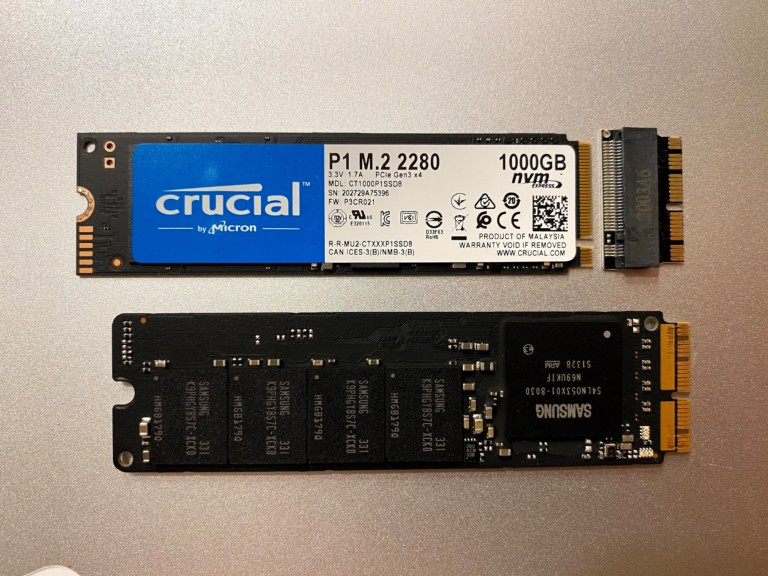
- NVMe 1000GB SSD
- Cruicial P1 M2 2280 about $100
- Note that if you have a Mid-2012 or Early2013, you can’t use this faster PCIe 2.0 based SSD because it’s a SATA based SSD.
- SSD Adapter
- Note that the Macbook applies a different type of connector from the normal SSD connector.
- Sintech ST-NGFF2013 , I bought with $4 from eBay.
- USB Stick(12GB or more)
- Pentalobe driver 1.2mm driver
- T5 Torx driver
Process
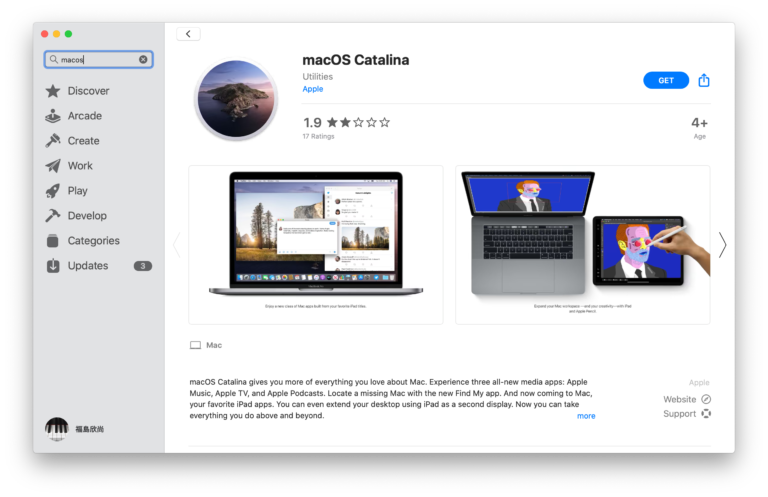
First, update your macOS to 10.13 High Sierra or later. This will install the latest drivers to recognize the SSD.
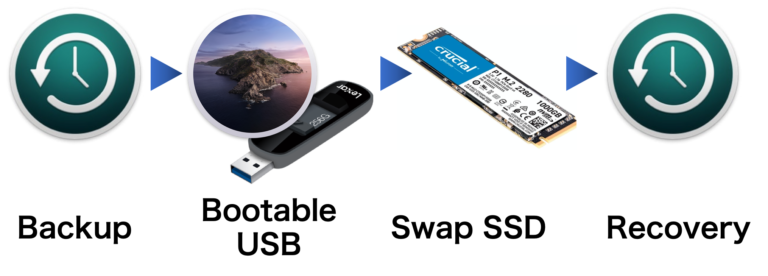
Next, make a backup with TimeMachine.
After that, create a boot disk. This is needed to restore after replacing the SSD. To do this, first, download macOS.
Once downloaded, do not proceed to the installation, close it with Command+Q or similar.
Open a terminal and enter the following command if your macOS is Catalina.
These assume that the installer is still in your Applications folder, and MyVolume is the name of the USB flash drive or other volume you’re using. If it has a different name, replace MyVolume in these commands with the name of your volume.
sudo /Applications/Install macOS Catalina.app/Contents/Resources/createinstallmedia –volume /Volumes/MyVolume
You will be asked if you want to execute it and what your password is, and after you enter it, the bootable files will be copied to the USB after a while.
Tips and Tricks while swapping your SSD
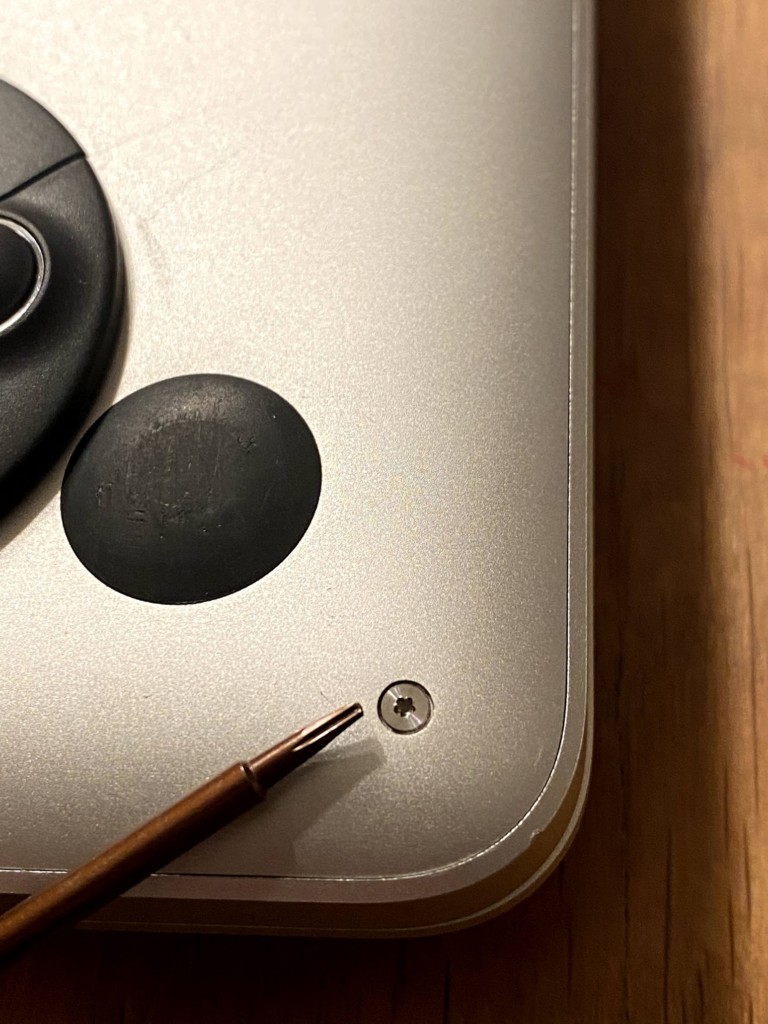
To replace the SSD, first open the back cover.
Then disconnect the power supplied by the battery before removing the SSD.
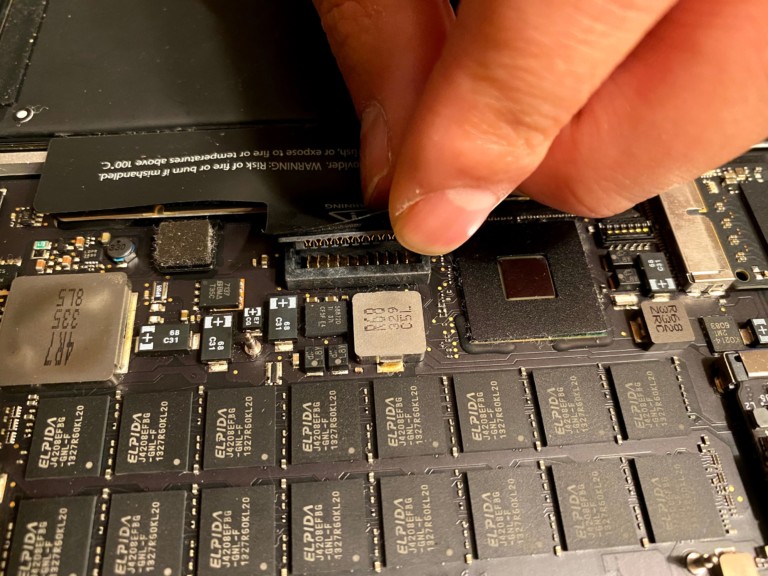
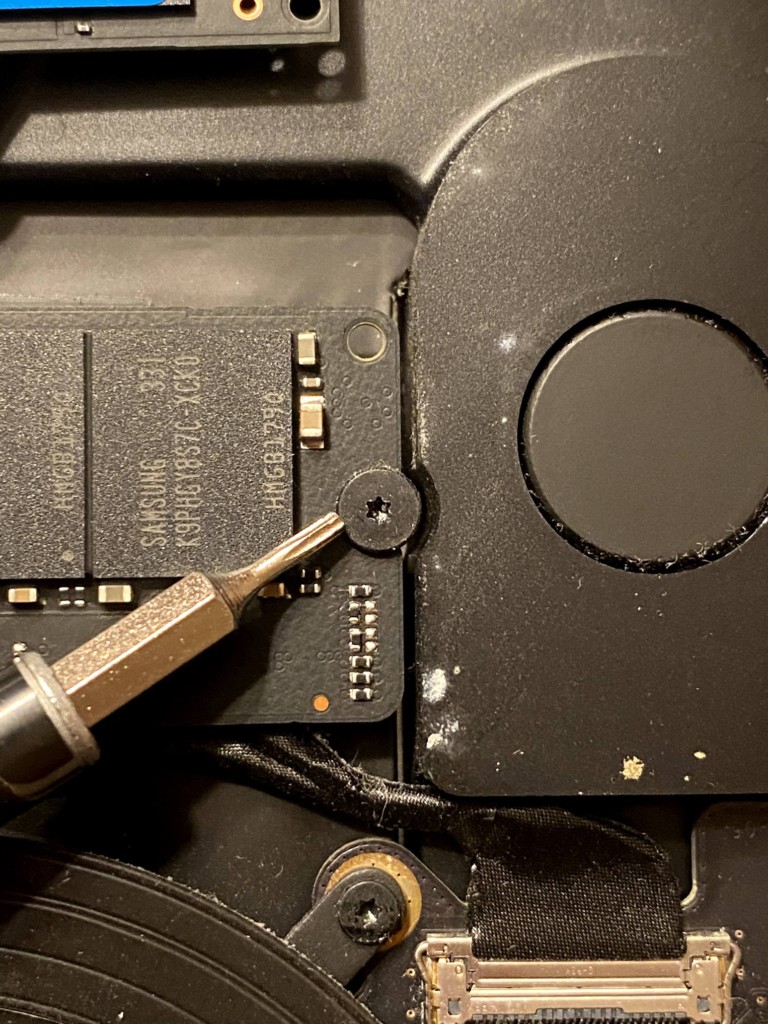
Remove SSD with T5 screw driver.
As mentioned earlier, the MacbookPro’s SSD has a different connector, so you’ll need to use an adapter.
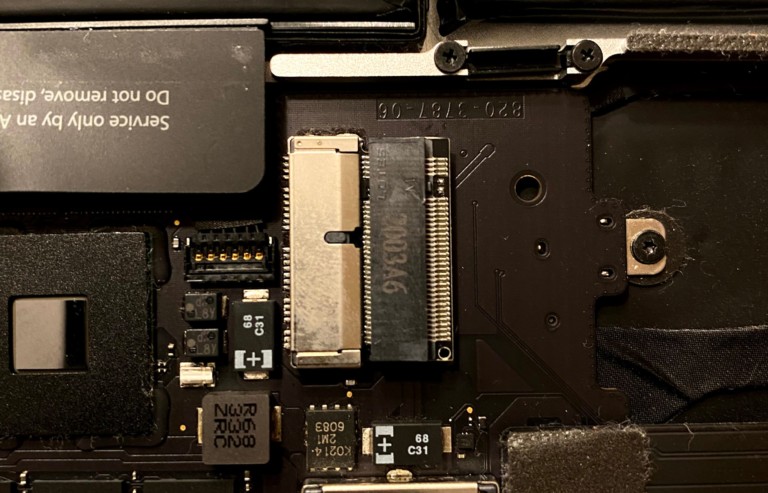
There are several adapters out there, but I purchased the Sintech ST-NGFF2013. I installed the adapter to the Mac side first, and then installed the new SSD. This way is easier than putting an adapter to SSD first.
Recovery
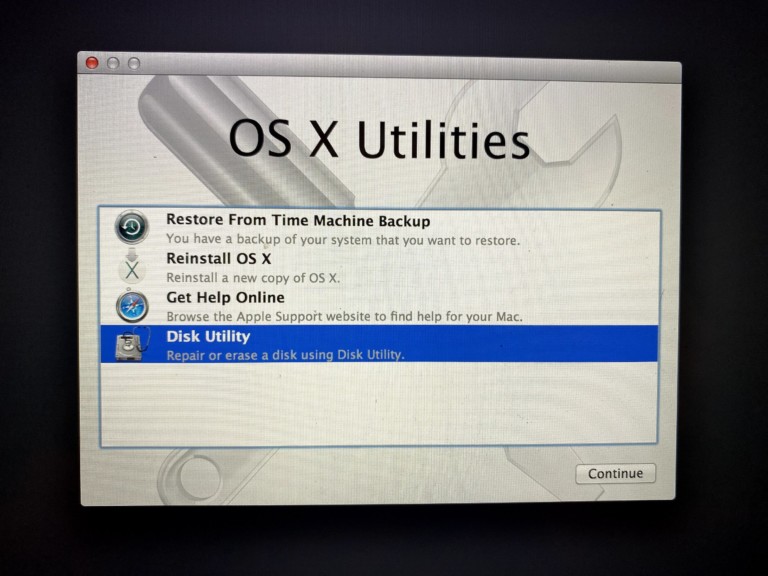
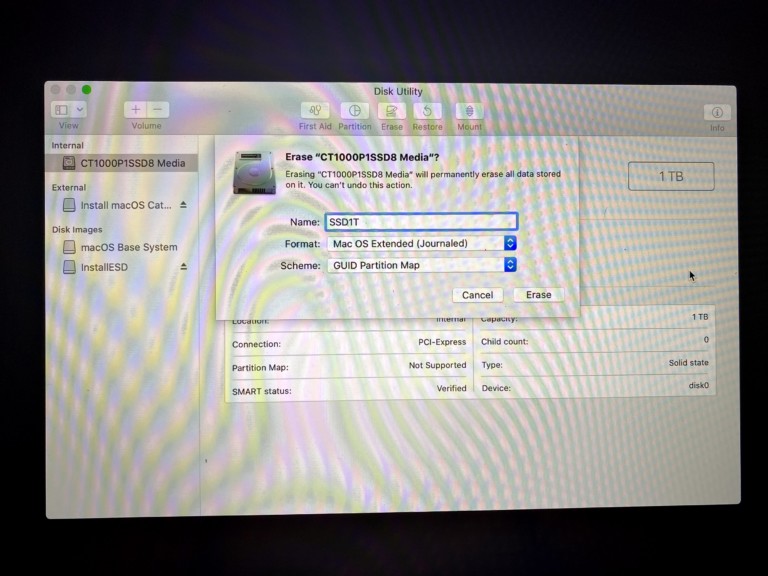
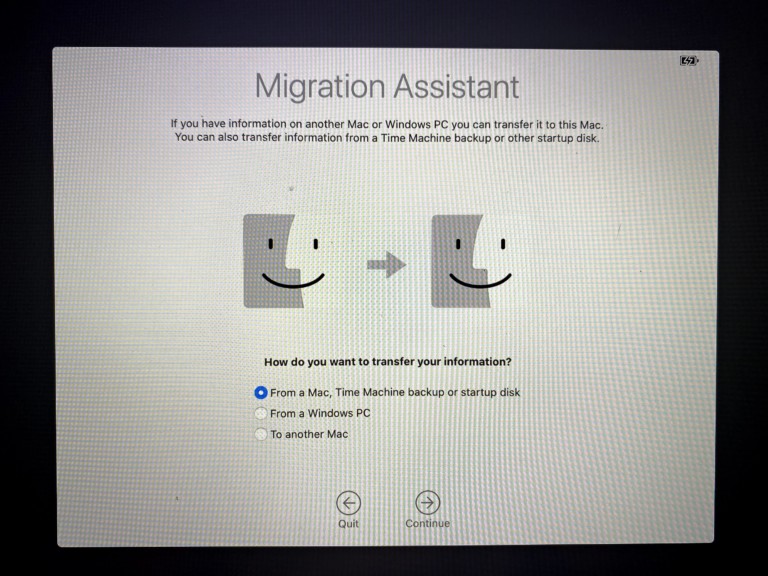
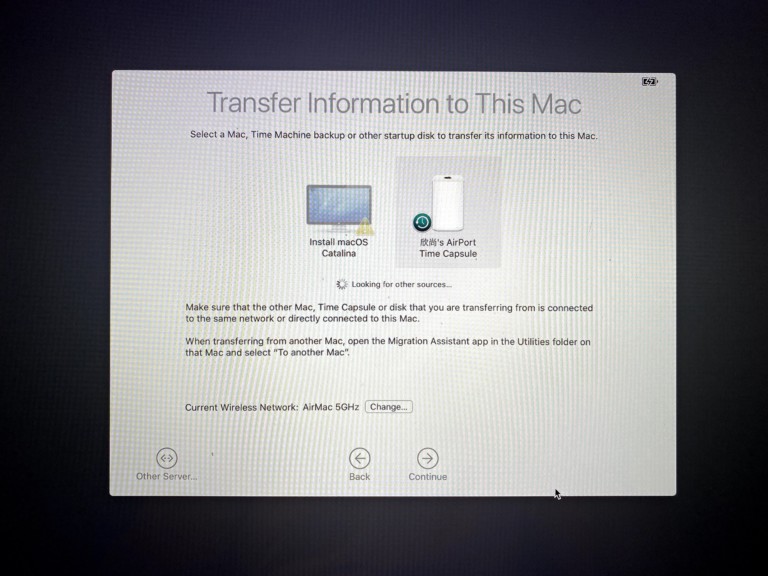
Plug in the USB device you created earlier and press the Option key when you start up your MacbookPro. Please select USB device to launch from it. At this time, because the newly inserted SSD is not recognized and cannot install OS, we need to format it with DiskUtility first. After that, you can restore from TimeMachine, it will take a few hours.
Some people may want to do a clean install of the OS first and then restore. In that case, you can use OS X Utilities to execute OSX installation first.
In my case, some data did not come back after the restoration, however, when I create a new account instead of overwriting the account at the time of restoration, all data came back. After that, you can delete the accounts you don’t want to use.
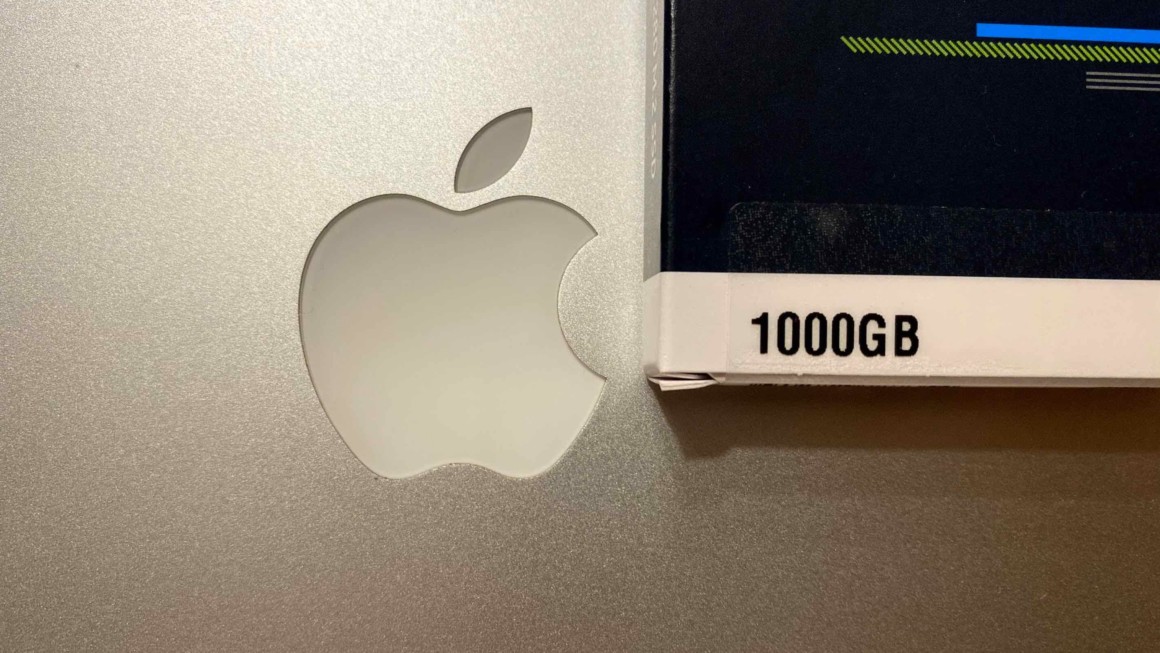
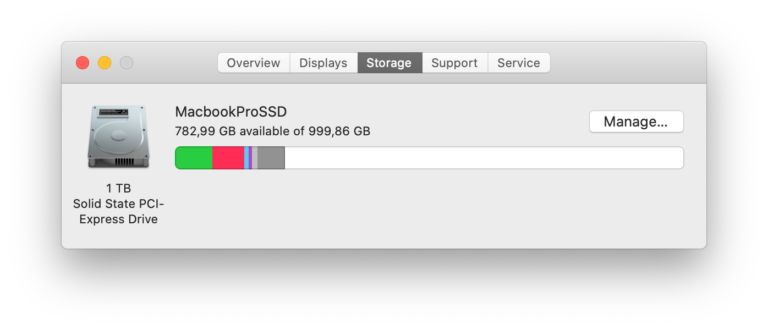
Overnight, the recovery was completed and all the data was returned. And as you can see, it shows 1TB.
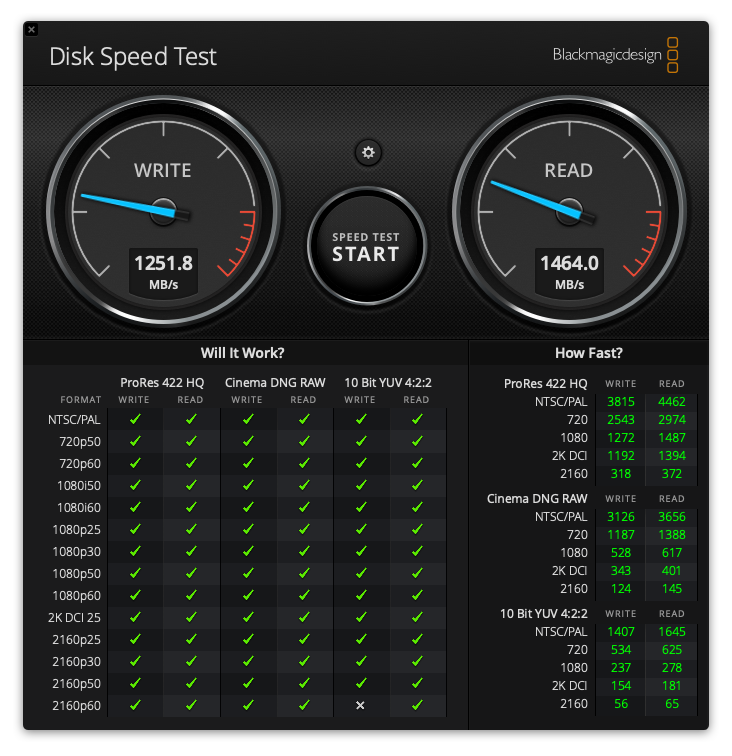
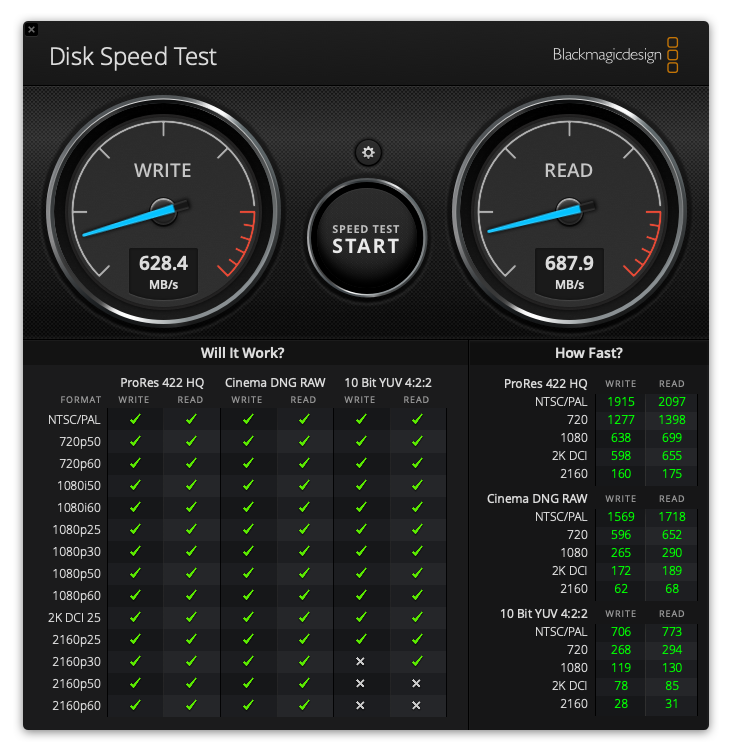
I did a speed test of Blackmagicdesign to check the operation. It is about 2 times Read / Write speed, Amazing.
A genuine Mac internal SSD is priced at $100 or more on the market like Amazon/eBay. By selling this via eBay, you will get back the cost of the 1T SSD you purchased.
Summary
In this article, I have introduced how to upgrade your MacbookPro Late 2013 to 1T SSD. It’s a good deal, and above all, it’s a good opportunity to use your beloved MacbookPro for a long time, so please give it a try. Note: Please be very careful about compatibility and static electricity when working with it. Modifications will not be covered by Apple’s warranty, so please do everything at your own risk.